Step 1 - Visit GST Registration Portal by following the link www.gst.gov.in
The following menu will appear.
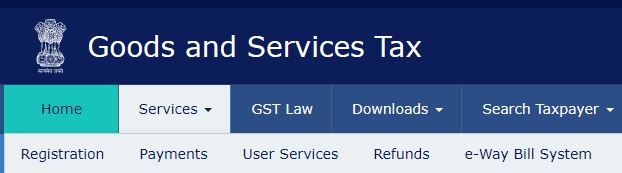
Step 2 - Click on Services then Registration then New Registration
Now the following menu will open
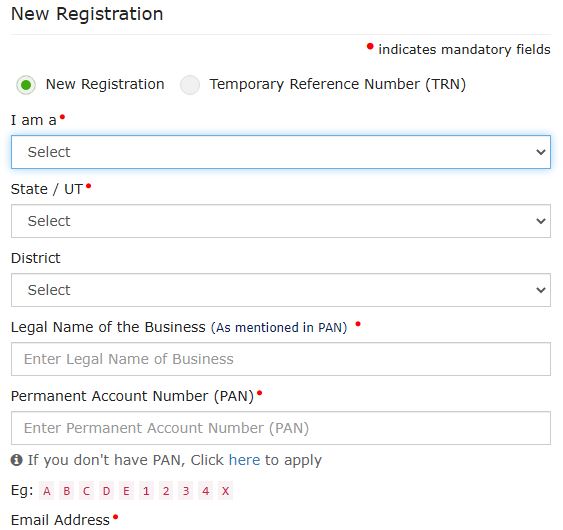
Step 3 - Fill necessary information:
I am a : Select one option from the drop down Menu
Tax Payer, Tax Deductor, Tax Collector (E-Commerce), GST Partner, Non Resident Taxable Person, United Nation Body, Consulate or embassy of Foreign Country, Other Notified Person, Non-Resident online Services provider.
State/UT : Select your state or Union Territory from the drop down menu
District : Select District
Legal Name of the Business (As mentioned in PAN) : Enter name of your business as per the PAN Card allotted to you.
Permanent Account Number (PAN) : Enter your PAN Card Number
(If you do not have PAN, you have to apply for it to register for GST)
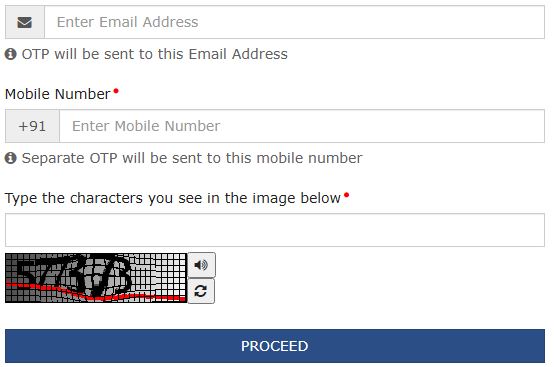
Email Address : Enter your E-mail Address
(OTP will be sent to this email address)
Mobile Number : Enter Mobile Number
(Separate OTP will be sent to this Mobile Number)
Type the characters you see in the image below : Enter Security code shown on the Screen.
Step 4 - Click on PROCEED
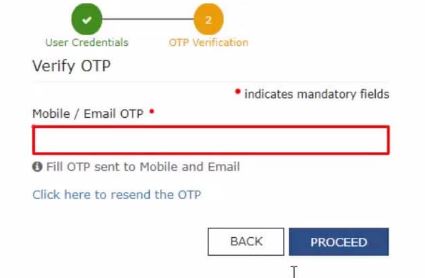
The following menu will open
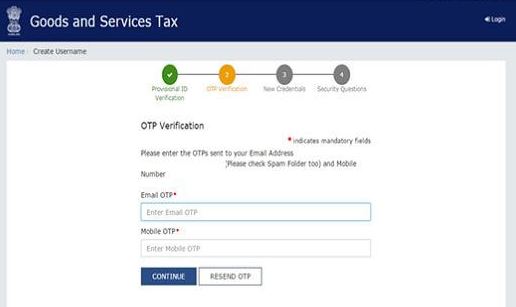
Step 5 : Enter OTP received on E-Mail and Mobile and Click on Continue
Now you will receive the 15-digit Temporary Reference Number (TRN) now. This will also be sent to your email and mobile or PAN-linked contact details. Note down the TRN. You need to complete filling the part-B details within the next 15 days.
Step 6 : Again go to GST Registration Portal by following the link www.gst.gov.in
The following menu will appear.
Step 7 - Click on Services then Registration then Temporary Reference No.
Step 8 : You will receive an OTP on the registered mobile and email or PAN-linked contact details.
Step 9 : Enter the OTP and click on PROCEED
Now the status of application will be displayed
Step 10 : Now fill Part B of the Application
To fill part B the following scanned documents should be ready
- Photographs
- Constitution of the taxpayer
- Proof for the place of business
- Bank account details*
- Verification and aadhaar authentication, if chosen
- Other documents if any, as shown in the website of GST
Step 11 : Enter Business details
- Trade Name
- Option for Composition : Select Yes or No
- Enter Date of Commencement of Business
- Estimated supplies and estimated net tax liability
- Reason for Registration : Select from the drop down menu
Step 12 : Click on Save and Continue
Step 13 : Enter Promoter/ Partner Details
Personal details such as name, address, mobile number, date of birth, email address and gender and identity details such as Designation / Status and Director Identification Number if the taxpayer is a company, whether or not an Indian citizen, PAN and Aadhaar numbers must all be entered. Fill in the residential address and upload a photograph of the stakeholder. You are allowed to upload PDF or JPEG files with maximum file size for upload of 1 MB.
Step 14 : Click on Save and Continue
Step 15 : Enter Authorised Signatory Details
Step 16 : Enter Principal Place of business details
The principal place of business is usually the address where the books of accounts and documents are stored, as well as where the top management is based. Enter the address, district, sector/circle/ward/charge/unit, commissionerate code, division code and range code. Also, enter the official contact number of taxpayer and nature of possession of premises as rented or owned or shared, etc.
Step 17 : Upload supporting documents, including consent letter or NOC for business on premises rented out.
Step 18 : Click on Save and Continue
Step 19 : Submit details of goods and services in the next tab along with the HSN codes or SAC for up to a maximum of 5 goods and 5 services on the top of your list.
Step 20 : Click on Save and Continue
Step 21 : Enter Bank Account details (Optional), Click on Save and Continue
Step 22 : Choose Aadhaar authentication option and Click on on Save and Continue.
Step 23 : Once all the details are filled in go to the Verification page. Tick on the declaration and submit the application using any of the following ways:
- Companies and LLPs must submit application using DSC
- Using e-Sign � OTP will be sent to Aadhaar registered number
- Using EVC � OTP will be sent to the registered mobile

Now a message is displayed on successful application and Application Reference Number (ARN) is sent to registered email and mobile. You can check the ARN status for your registration by entering the ARN in GST Portal.
Disclaimer: Information given here is to guide and help those want to know the procedure to apply online for GST Registration. We are not responsible for any mistake or error. This is a website providing free information and we do not charge any amount from any user for our services. Trade marks and copy rights are of respective website owners
GST Registration online www.gst.gov.in
How does GST Work and the benefits
Central, State level taxes absorbed GST
Registration Procedure and filing Return
GST E-way bill validity & documents
The Central Goods and Services Tax (Amendment) Act, 2018
The Integrated Goods and Services Tax (Amendment) Act, 2018
The Union Territory Goods and Services Tax (Amendment) Act, 2018
Central Goods and Services Act 2017 (CGST Act 2017)